Eyeball Drawing: Mastering the Art of Realistic Eye Sketches

Learn how to master eyeball drawing with realistic techniques, shading tips, anatomy insights, and stylization strategies to improve your art skills dramatically.
If you’re fascinated by the human eye and love to draw, you’ve likely tried your hand at eyeball drawing more than once. Drawing the eyeball is one of those fundamental skills every artist returns to, again and again, whether you’re sketching hyper-realistic portraits or developing stylized characters. It seems simple at first — a circle with a dot in the middle — but once you dive into the world of eyeball drawing, you realize it’s so much more than that.
This article is your ultimate guide to mastering eyeball drawing. Whether you’re a beginner or a seasoned artist wanting to refine your skills, we’ll cover everything from basic structure and anatomy to shading techniques, reflections, stylization, and more. So grab your sketchbook and pencils, because it’s time to level up your eyeball drawing game!
Understanding the Anatomy of the Eyeball
Before putting pencil to paper, it’s important to understand the anatomy of the eyeball. The more you understand what you’re drawing, the more realistic and convincing your artwork will be. Even if you’re going for a more cartoony or stylized version, knowledge of real anatomy helps you exaggerate with intention.
The human eyeball is a sphere, roughly 24mm in diameter. The visible parts include the sclera (white part), the iris (colored part), the pupil (black center), and the cornea (transparent dome over the iris and pupil). You also have the eyelids, eyelashes, tear ducts, and surrounding skin that influence how the eye looks in a drawing.
Understanding light behavior in and around the eye is crucial too. The cornea reflects light, creating highlights, and the curvature of the eyeball causes subtle shadow changes across the surface. When you start observing these things in reference photos or real life, your eyeball drawing will automatically start looking more three-dimensional and alive.
Tools and Materials for Eyeball Drawing
You don’t need a whole studio setup to get started with eyeball drawing, but having a few go-to tools makes a big difference. Traditional artists will want a range of graphite pencils (HB to 8B), an eraser (preferably a kneaded one), a blending stump, and high-quality drawing paper.
Digital artists can explore various brush settings in software like Procreate or Photoshop. The advantage of digital drawing is that you can experiment more freely, undo easily, and try different textures without committing to one.
Regardless of your medium, the most important tool is your eye (no pun intended). Observe closely, sketch regularly, and try different angles and lighting conditions. The better you train your observation skills, the better your eyeball drawing will become.
Sketching the Basic Structure
When you’re starting an eyeball drawing, it’s tempting to jump right into details. But laying down the basic structure first helps keep proportions in check. Begin with a circle — this represents the eyeball. Then draw the almond-shaped outline of the eye around it.
Keep your lines light and loose. Add the iris, which is also a circle, and position it so it looks natural based on the gaze direction. Remember, the eyelids wrap around the eyeball, and they’re never just flat lines. Sketch out the upper and lower lids as gentle curves that wrap over the sphere.
Getting the placement and size of each part correct early on saves a lot of time later. Make sure the iris isn’t too large or too small for the eye, and remember that the pupil is always centered in the iris, regardless of where the eye is looking.
Adding Depth with Shading

Shading is where the magic happens in eyeball drawing. It takes your flat sketch and turns it into something realistic and dimensional. The key to effective shading is understanding where the light source is coming from and how it affects the eyeball’s surface.
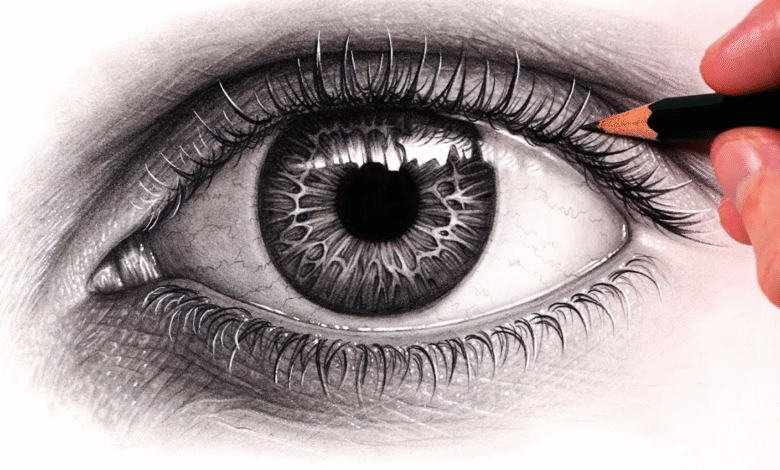
Start shading the sclera with very light tones. It’s not pure white; shadows from the eyelids, eyelashes, and the eye socket give it dimension. The iris typically has radial patterns and a gradient that goes from light to dark, depending on the lighting.
The pupil should be the darkest part of the eye, but make sure you leave room for the catch light — that small highlight that gives the eye life. Use your blending stump for smooth transitions, especially in the skin around the eye, which also adds to the realism of your eyeball drawing.
Detailing the Iris and Pupil
The iris is one of the most detailed and visually interesting parts of the eye. It’s full of subtle lines, textures, and variations in tone. Use reference photos to study how the iris looks under different lighting conditions. You’ll notice it often appears darker around the edge and lighter near the pupil.
To create realistic iris texture in your eyeball drawing, use fine lines radiating from the pupil outward. Don’t make them uniform — some can be thicker, broken, or more textured. Blend lightly to soften them but maintain some crispness to retain realism.
The pupil, being the darkest part, creates contrast that helps your eyeball drawing pop. It should always have a clear highlight or two that reflects the light source. These highlights are crucial to making the eye appear moist and reflective.
Drawing Eyelids and Lashes
While the eyeball is the focus, the surrounding elements like eyelids and lashes play a massive role in completing the drawing. The upper eyelid casts a shadow over the eyeball, and its thickness can affect how much of the eye is visible.
Use shading to indicate the roundness of the eyelids. Don’t forget the crease above the upper lid, which adds realism. Eyelashes should be drawn in fluid strokes, curving gently and varying in length and direction. Avoid drawing them like straight spikes — this is a common beginner mistake.
Lashes naturally group together in clumps and taper at the ends. For a more natural look, consider how gravity affects their direction, especially on the lower lid. These subtle touches elevate your eyeball drawing from good to great.
Realism vs Stylization
One of the joys of eyeball drawing is that you can choose how realistic or stylized you want your art to be. Hyperrealistic eyes require immense attention to detail, texture, and lighting. Stylized eyes, such as those in anime or cartoons, often exaggerate certain features while simplifying others.
The key to good stylization is knowing what to keep and what to simplify. For instance, you might keep the iris highlight but remove the tiny muscle textures. Or you might enlarge the iris and pupil for emotional effect while simplifying the eyelid structure.
Both approaches are valid. Practicing realism sharpens your observational skills, while stylization gives you creative freedom. Either way, a well-drawn eye conveys emotion and connects the viewer to your subject.
Using References Effectively
A good reference can make or break your eyeball drawing. High-resolution images show details you might not think of, like tiny blood vessels in the sclera, subtle color variations in the iris, or how the light wraps around the eyeball.
Don’t just copy the reference. Analyze it. Where are the shadows? Where does the highlight fall? How does the eyelid overlap the eyeball? What mood does the eye convey? Answering these questions helps you translate real-life elements into your unique drawing style.
Try using a mirror to observe your own eye or take close-up photos from different angles and lighting. Practicing from life trains you to observe and capture subtle differences that improve your overall drawing technique.
Common Mistakes and How to Avoid Them
Even experienced artists can fall into common traps when doing an eyeball drawing. One major mistake is making the white of the eye too white. As mentioned, the sclera has shadows and often a hint of color that adds realism.
Another mistake is symmetrical eyelashes. Eyelashes aren’t identical on both eyes and definitely not perfectly spaced. Similarly, avoid placing the iris in the dead center every time unless that’s intentional. The placement affects the direction of the gaze and the overall feel of the portrait.
Rushing into details before getting the basic shapes and proportions right is another pitfall. Always build your drawing in layers: start with structure, move to shading, and finish with details. This method gives you more control and a cleaner result.
Practicing Eyeball Drawing Daily

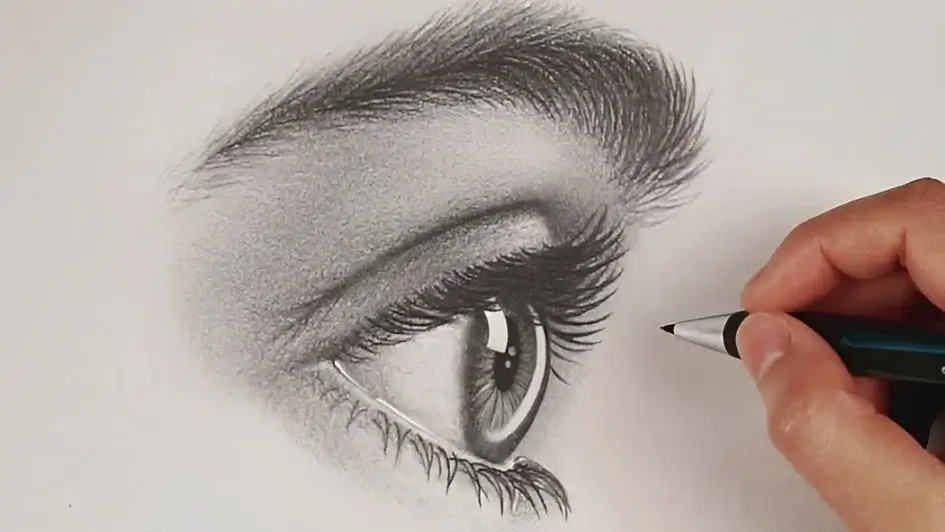
Like any skill, consistency is key in improving your eyeball drawing. Make a habit of drawing at least one eye every day. Challenge yourself with different angles — side views, upward glances, squints, wide-open eyes. Each pose teaches you something new.
Keep a sketchbook dedicated to eye studies. Track your progress, experiment with styles, and note what works and what doesn’t. Over time, your confidence and muscle memory will improve, and you’ll develop your signature way of drawing eyes.
Try doing quick five-minute studies to train your observation speed or long detailed studies to refine your technique. The goal isn’t perfection; it’s growth.
Frequently Asked Questions About Eyeball Drawing
What is the best way to start an eyeball drawing? Start with a circle to represent the eyeball, then sketch the eyelid shape around it. Add the iris and pupil, keeping your lines light and loose. Focus on structure before adding detail.
How do I make the eyeball look realistic? Use shading to add depth, pay attention to light sources, and observe how shadows and highlights fall on the eye. Include subtle details like the wet tear line and reflection in the pupil.
Why does my eyeball drawing look flat? Flat drawings often lack proper shading or contrast. Try emphasizing the spherical nature of the eyeball with soft gradients, and avoid outlining everything in harsh lines.
Should I always use a reference? Yes. References provide real-world examples of lighting, anatomy, and texture. They help you draw more accurately and train your observation skills.
How long does it take to get good at eyeball drawing? This depends on your practice frequency and attention to feedback. With consistent effort and study, you can see significant improvement within a few weeks or months.
Conclusion: Eyes That Speak
Eyeball drawing is more than just a technical skill; it’s a way to express emotion, tell stories, and bring characters to life. Whether you’re chasing realism or crafting stylized illustrations, the eye is a powerful focal point in any piece of art.
By understanding anatomy, practicing shading, observing references, and drawing consistently, you’ll turn your eyeball drawings into captivating, expressive works that feel truly alive. Keep practicing, stay curious, and let your eyes do the talking on the page.

